This is an old revision of the document!
Getting started with Jitsi-Meet
Be prepared
First of all you'll need a computer with a webbrowser (ideally something Chrome/Chromium based, avoid Firefox) and a connected microphone, alternatively you can use an iOS or Android device.
Ideally you'd use some headphones to avoid your microphone picking up the sound coming from your system.
A webcam is completely optional.
Choosing a room name
After visiting meet.fslab.de you'll have to choose a room name.
You could take one of the suggested random namens, that way it can't be easily guessed and people won't stumble into your conference. This is best for temporary rooms and groups of only a few selected people.
If you want to hold a regular meeting or lecture it's best to give your room a meaningful name, e.g. FSLabWeekly.
The choice is yours, just don't call it something like test or you'll have a lot of people crashing your meeting ;)
Giving microphone (+webcam) permission
If you just want to listen, you could block any permission dialog, but if you want to actually speak in a conference you'll have to grant microphone permissions.
On first visit your browser will (separately) ask if microphone and webcam permissions should be granted.
If you accidentally closed the dialog you can access the permissions in Chrome, Chromium, other Chrome derivations and even in Firefox by simply clicking on the lock symbol in the URL bar.
Password protection
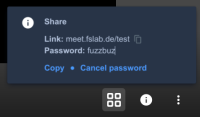
When you first create the room you'll be greeted by an information dialog containing the link to the meeting and an option for adding a password.
If you want your meeting to be private simply click on Add password, insert a password and confirm with the enter key.
The information dialog can be reopened by pressing the circled i button in the bottom right corner.
On mobile this option is available from the conferences menu.
During the Meeting
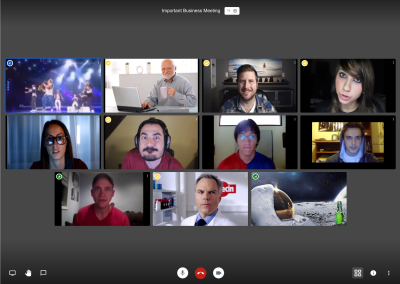
During the meeting you'll see a relatively simple UI.
As biggest element in the middle you'll see either the webcam of the currently active speaker, or a grid overview of all participants.
Right side
On the right side you'll have a list of all participants.
Clicking on a participant will open their webcam (if available) in the big view.
Clicking again will go back to the active speaker.
Bottom left corner
The leftmost button in the left corner enables screen and tab sharing, that way you can easily hold presentations or demonstrate something.
Next to that is a hand symbol that will announce in a silent notification and a little icon that you'd like to speak.
This is ideal for asking questions during a presentation or lecture, so that the speaker can pause at the next best point.
The last icon in this corner opens a chat window which can be used to e.g. share links to documents or also for asking questions.
Bottom middle
These buttons are quite obviously marked.
The leftmost button enables/disables your microphone, the rightmost button does the same for your webcam, the red button kicks you out of the meeting.
One little hidden feature is that by re-enabling your webcam during screensharing you'll automatically get a Picture-in-Picture view.
Bottom right corner
The grid view can be enabled/disabled using the left-most button in the bottom right corner.
Next to the grid view button is the previously mentioned button for the information dialog, giving you as moderator the option to set a password, otherwise it simply contains the link for sharing the conference.
The rightmost button opens a menu with a few options, from there you can manage your video quality, start a youtube live stream or start a recording (which can later be accessed on lectures.fslab.de/jitsi).
This menu also contains a button to some additional Settings:
Devices: Here you can test and select your Microphone/Webcam (if you have more than one)Profile: Allows you to set your name and a gravatar mail address for a profile picture (requests are anonymized, mails hashed)More: Gives moderators the option to automatically mute new participants and make their local conference view shared with all members (e.g. activating the grid view)

